REST Mappings
It is possible to configure custom REST endpoints in TIF that are used by another system. Calling such REST endpoint will trigger a job to be executed in TIF that will perform some operation. In order to do so, you need to create a few things in TIF such as:
- REST Mapping
-
Defines the end-point details, such as the URI, HTTP method and some other settings.
- Service
-
You need at least one service in TIF that will execute the jobs for the particular REST Mapping. The service can be shared with other REST Mappings or a dedicated service for the one you create.
- Access Token
-
You need to create a token that allows the other system to call TIF. These are created from the Administration UI. A token should be handled as secret as possible in order to prevent unauthorized access to your data. See this page for more details
REST Mapping
A REST mappings is used to declare end-points that allows a remote system to initiate a job in TIF.
Within the Administration UI, you need one "service" to be created. See this page how to understand the services within TIF.
A REST Mapping can be created from two different locations. Either you start from the service and from the "Actions" menu choose "Map" → "REST". Or, via the root category "Mappings" choose the tab "REST Mapping", which will show all REST mappings added.
Now, you can create a new REST mapping. The following properties are available on the REST mapping:
| Property | Description | Required |
|---|---|---|
Name |
Gives the REST mapping a name |
Yes |
Description |
Some useful description |
No |
Enabled |
Whether or not the REST mapping is active. |
Yes |
Required Scopes |
Optionally declare specific scopes that is required by the caller, e.g. the access token used by the caller need to be granted these scopes in order to allow using the REST mapping |
No |
Configuration Ref |
Specify what configuration to be used. The configuration contains the logic to fulfill the use-case of the REST endpoint. See this document for more details. |
Yes |
Agent |
Declares what 3DEXPERIENCE™ Agent to be used when querying for data from the 3DEXPERIENCE™ platform. Required in case your job does 3DEXPERIENCE™ calls. |
No |
Security Context |
Declares a specific 3DEXPERIENCE™ security context to be used for the Agent. Optional. |
No |
HTTP Method |
One of: GET, POST, PUT, PATCH or DELETE. Default is POST. |
Yes |
URI Filter |
Specifies the URI to match with. Examples:
Note that you can also use wildcards such as "*" or "**". The latter wildcard is used to capture "the rest", while the single asterisk only captures one path item. |
Yes |
Synchronous |
Specifies if the request that requests the job to be created will wait for the job to complete or not. Default FALSE meaning that the job will execute asynchronously. This is the recommended mode. |
No |
Header Filter |
Multi-line value. Each line specifies its own filtering rules. A line can be in one of the following formats: Where the meaning of each line means: The header with the specified name must be included in the request, but the value is irrelevant A header with the specified name may NOT be included in the request A header with the specified name AND value must be included in the request. |
No |
Parameter Filter |
Similar way of working as the "Header Filter" but the rules are applied to the request parameters. |
No |
The base URL for any REST mapping that you declare will be:
https://<tif-tenant>.tif.technia.cloud/integration/api/v1/newjobThen your REST mapping specific URI must be added to this base URL.
An example request that would invoke a custom REST Mapping with TIF could look like this:
POST https://<tif-tenant>.tif.technia.cloud/integration/api/v1/newjob/products/12345Example
Goal: Set up a basic REST endpoint that can be called using cURL from the command line.
Follow the steps below.
Create a Configuration
The first thing to do is to create a configuration, which contains the business logic executing the use-case.
Go to Configurations → Actions → Create, and enter the following properties:
- Name
-
REST-Example.js - Type
-
Builtin: JavaScript Executor
Click Submit.
When the Code Editor is opened, just add this content
const data = { 'Hello': 'World' };
context.result()
    .data(JSON.stringify(data), 'application/json')
    .message('Job completed');
Click Save.
Create Service
Now we need to ensure that we have a Service available. If there is no service added in the system yet, go to Services and click Create.
You can for example call this new service REST-Example and you can leave the other fields as is.
Create an API Token
You need an API Token to be able to call TIF Cloud from the outside.
Go to "Tokens" → "Create"
See images below for an example how to fill in the values.
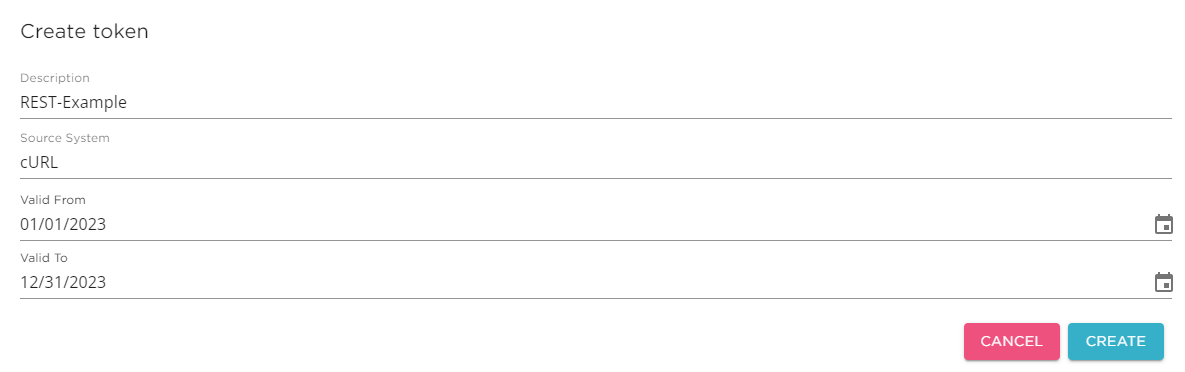
After creation, you must on the second screen copy the token to some place as you can never view the token in clear text after closing this dialog.
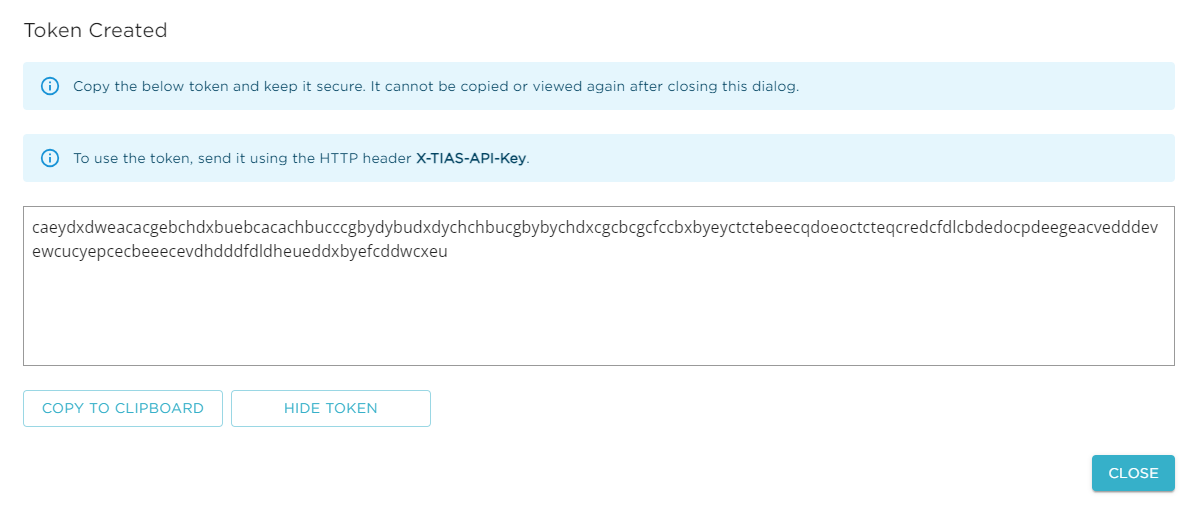
In this case, we copy the below string to a secret location
caeydxdweacacgebchdxbuebcacachbucccgbydybudxdychchbucgbybychdxcgcbcgcfccbxbyeyctctebeecqdoeoctcteqcredcfdlcbdedocpdeegeacvedddevewcucyepcecbeeecevdhdddfdldheueddxbyefcddwcxeuCreate the REST Mapping
We can now create the REST mapping.
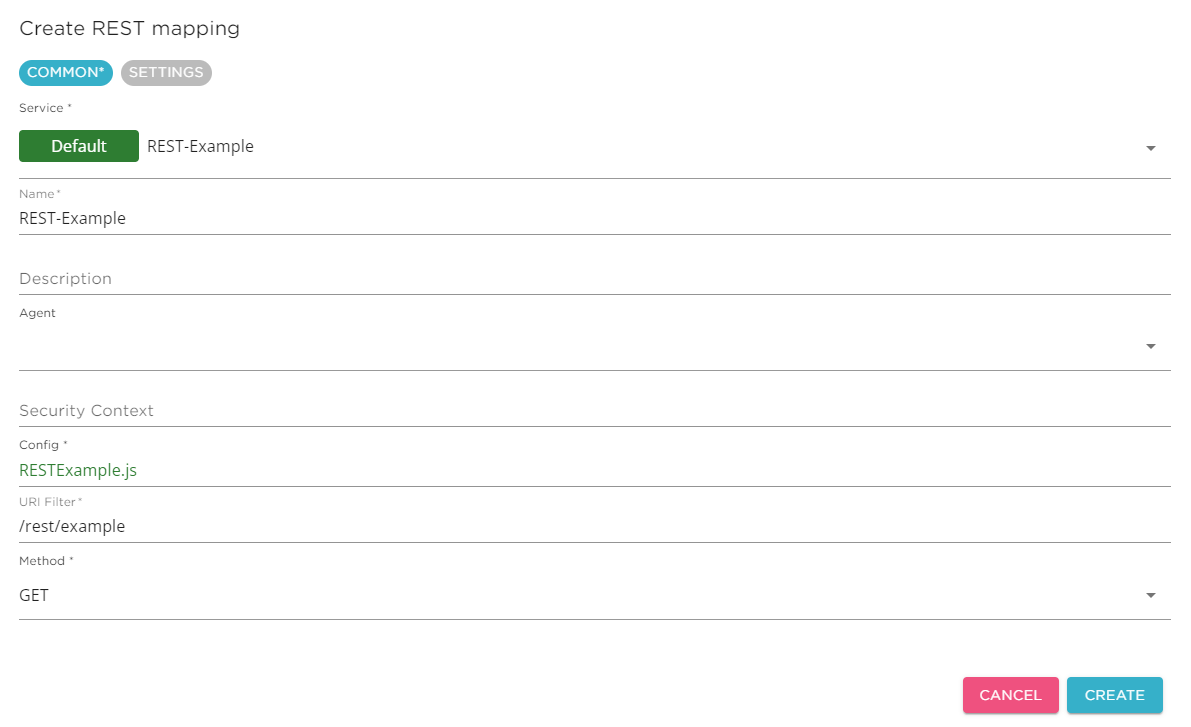
Go to "Mappings" → "REST Mappings" and click "Create".
-
Point out the service you created in previous step.
-
Use the REST-Example.js configuration you created in previous step.
-
Use a URI pattern like
/rest/example -
Use HTTP method for example
GETin this case
See screenshot below
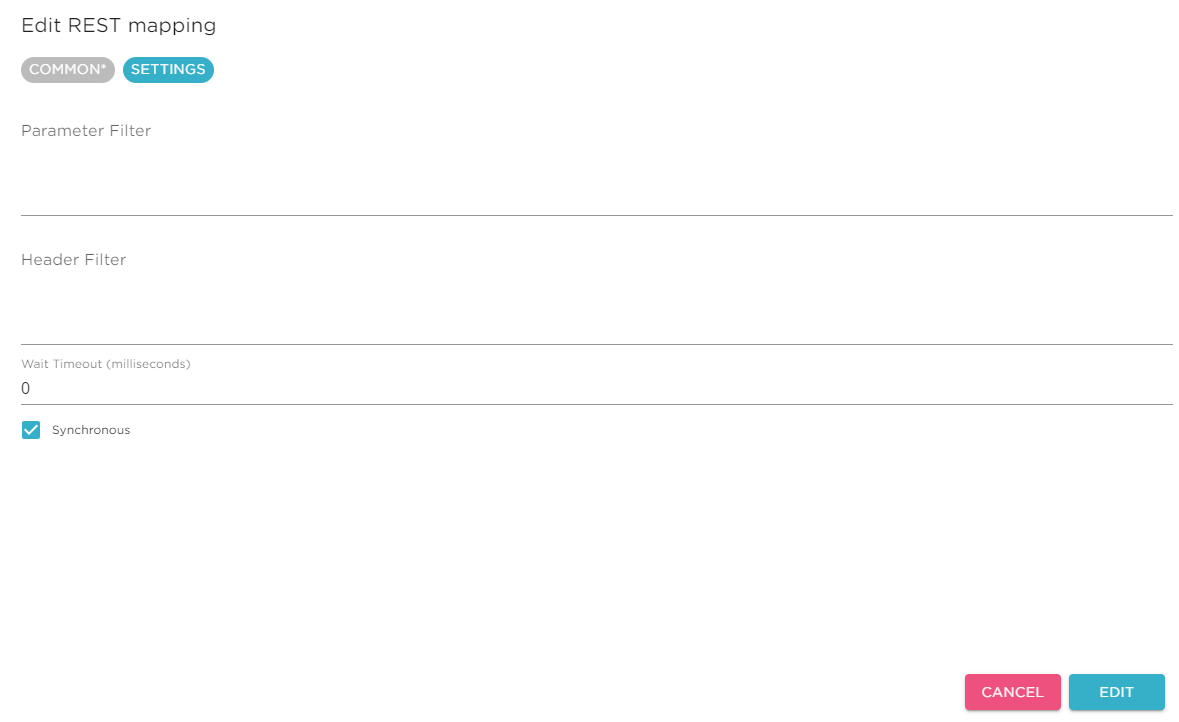
On the settings tab, you can tick the "Synchronous" checkbox to allow the client to await the response.
Test
Now we have all puzzle pieces ready to be able to call the end point from the outside.
|
You can test the REST mapping also from the application itself, either with a TIF Token OR using the credentials of your own. Use the "Test" button on the REST Mapping directly. This can save some time during development as you do not have to leave the application nor have to create TIF Tokens. In this example, we will show the complete test scenario. |
For this, we use the tool cURL typically available in most terminals (Bash etc). But you can also use Postman or similar tool.
#!/bin/bash

TIF_TOKEN=caeydxdweacacgebchdxbuebcacachbucccgbydybudxdychchbucgbybychdxcgcbcgcfccbxbyeyctctebeecqdoeoctcteqcredcfdlcbdedocpdeegeacvedddevewcucyepcecbeeecevdhdddfdldheueddxbyefcddwcxeu

TIF_BASE_URL=https://<tenant>.tif.technia.cloud
TIF_REST_MAPPING_URI=/rest/example

curl -i -X GET -H "TIF-API-Key: ${TIF_TOKEN}" \
  ${TIF_BASE_URL}/integration/api/v1/newjob${TIF_REST_MAPPING_URI}
The -i switch is used to allow inspecting the response headers.
|
Running this will cause a Job to be created in the TIF environment and since the synchronous flag was selected, the response will be returned.
See example output below (some response headers removed for readability).
HTTP/1.1 200 OK
Date: Tue, 24 Oct 2023 15:01:34 GMT
Content-Type: application/json
TIF-Job-Id: e4c5815b-3c20-4193-9e45-287880f5a6bb
TIF-Job-Status: COMPLETED
TIF-Async: false

{"Hello":"World"}
Read more in this document about inbound integrations.