Getting Started
The goal is to establish the connection between TIF and the 3DEXPERIENCE™ Cloud application.
Pre Requisites
The person who does the preparations in the 3DEXPERIENCE™ environment, must have the Enterprise Integration Architect (PFI) role.
This person must also be an Administrator of the tenant.
Also note that if you edit an existing agent that is being used from your integrations in TIF, you must also update the agent in TIF.
Step 1: Create an Agent in 3DEXPERIENCE™
First step is to create an Agent in the 3DEXPERIENCE™ Platform.
That is done from the Agent Management widget within 3DDashboard.
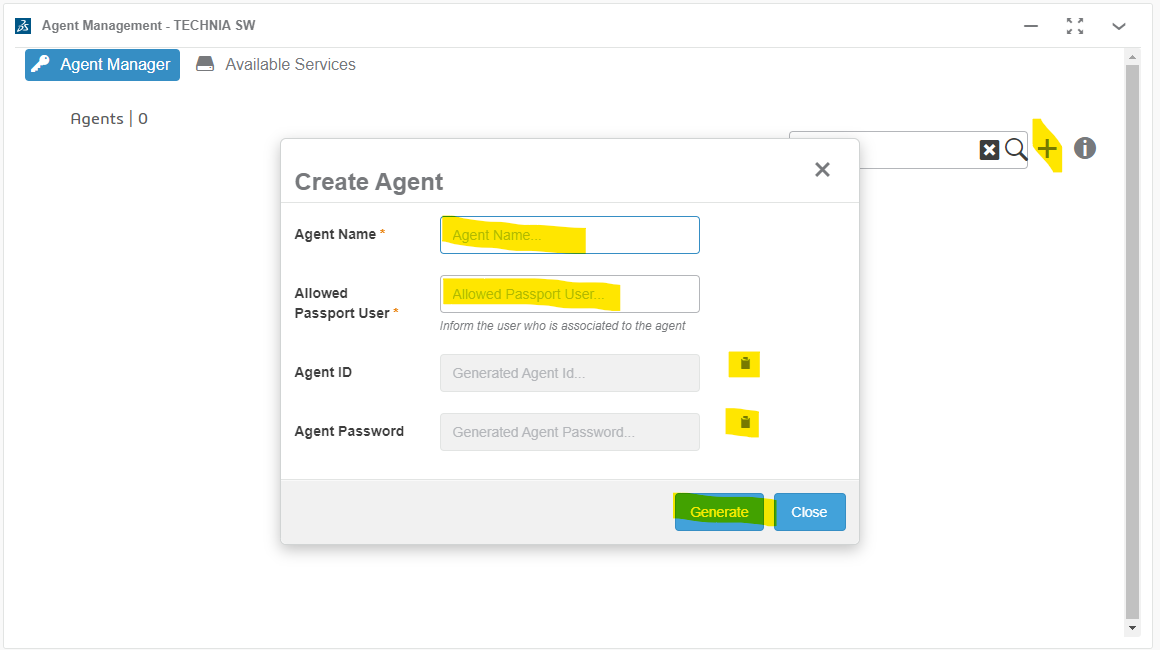
Remember to copy both the Agent ID and the Agent Password as you need to enter this into the TIF Administration UI in the coming step.
|
The agent should not operate as a user having the Administrator role as this will not work when using the DS REST APIs further on. This is a restriction from the 3DEXPERIENCE™ platform itself. |
Step 2: Create an Agent in TIF
Now we will create the corresponding agent within the TIF Administration UI.
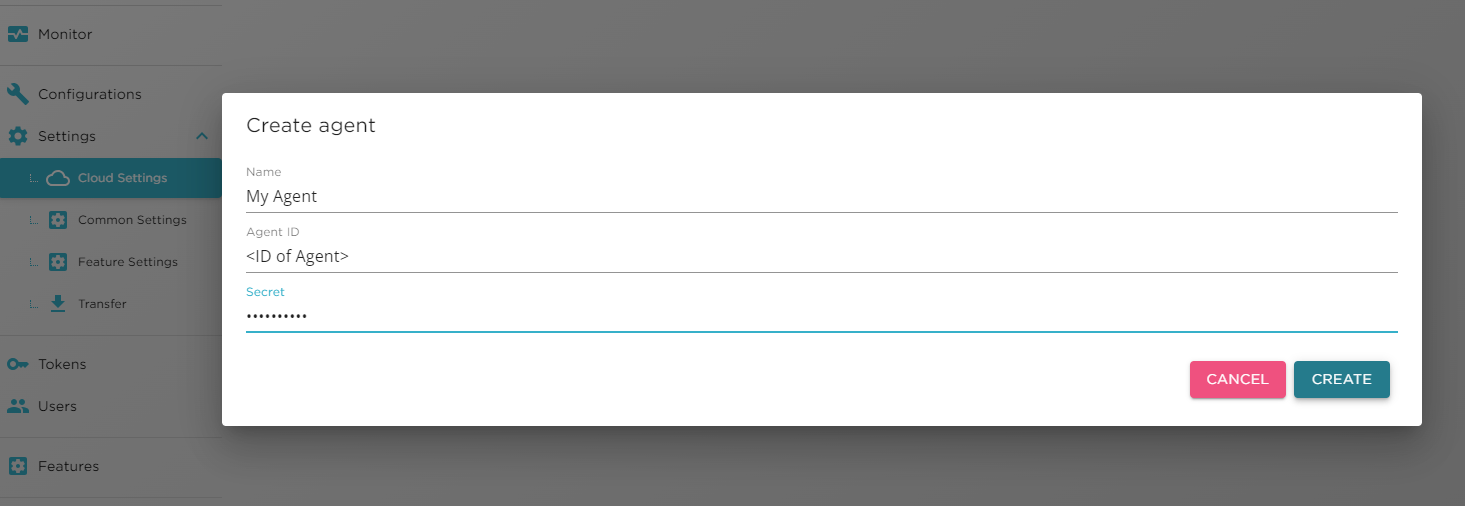
Here you give the Agent a logical name + enter the Agent ID and Password (secret) as copied earlier.
| The information entered is stored encrypted and once entered, no-one can see it again. |
Step 3: Configure the Connection
The next step is to configure the connection URLs from TIF to 3DEXPERIENCE™. From the same widget as you used in 3DDashboard when creating the agent, there is a tab called "Available Services".
Within this tab, all connection details are available.
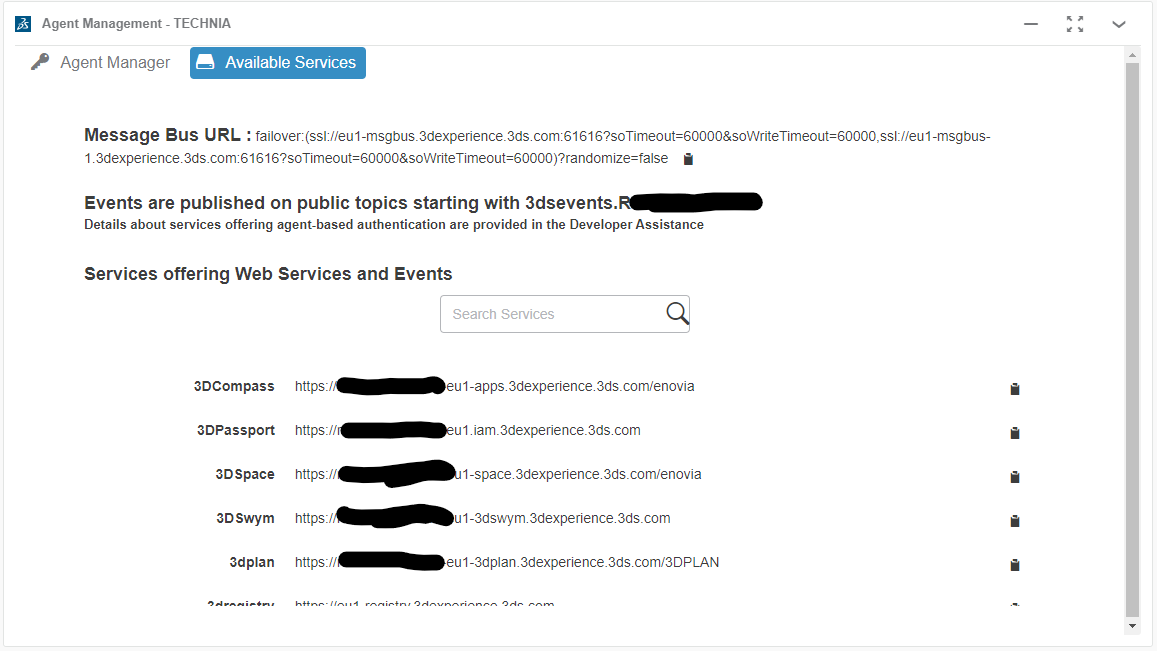
This information must be provided for the TIF Administration UI. Although the application tries to help you fill in the values, you should compare these with what’s provided from the 3DDashboard widget as there might be some differences not being handled at the moment.
Within the TIF Administration UI, go to "Settings" → "Cloud Settings" → "Connection".
Fill in the name of the 3DEXPERIENCE™ Tenant. This typically starts with the character 'R' followed by a number.
Once this value is changed, most of the fields are updated automatically. Review these values and compare with the ones provided from 3DDashboard.
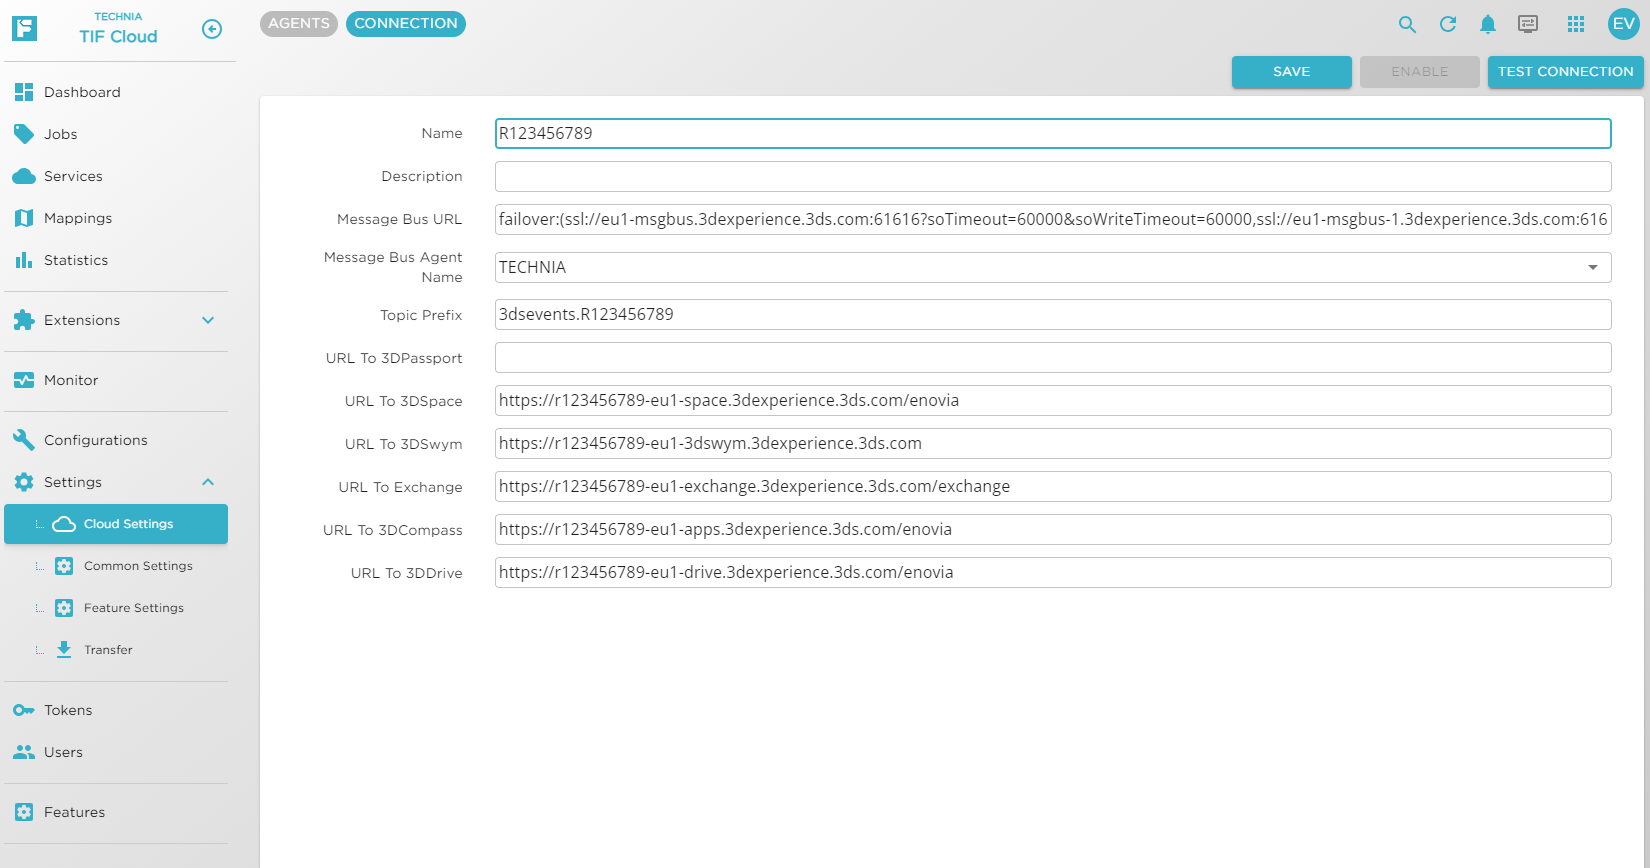
Remember to select the "Agent" to use when authenticating against the Message Bus.
Press Save to persist the values.
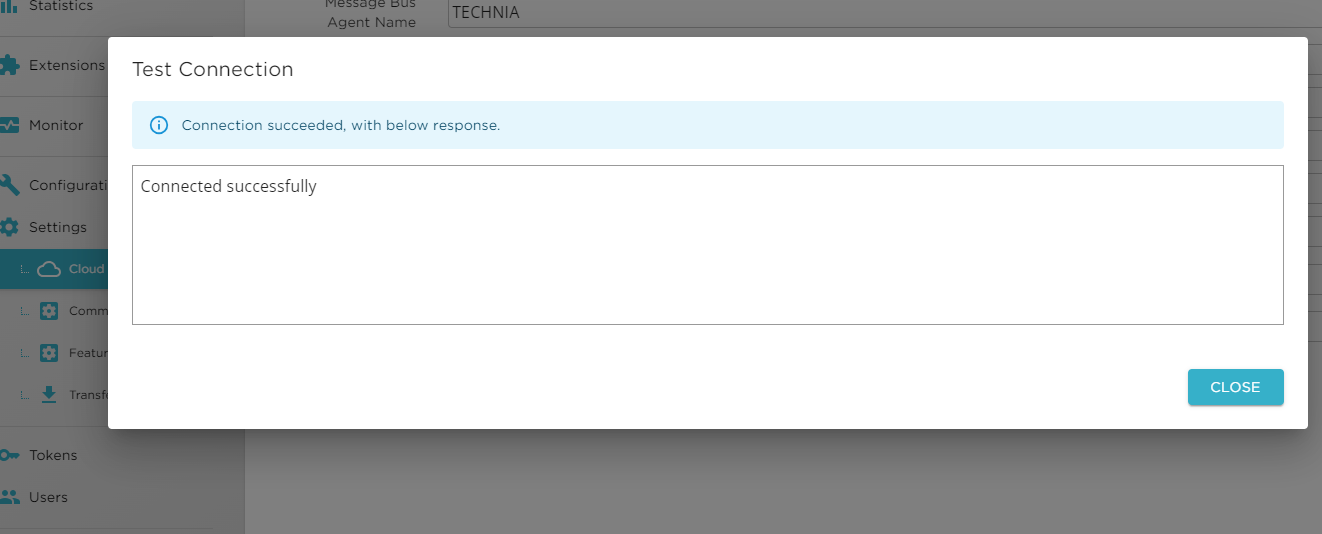
To test the connection, use the "Test Connection" button and await the result.
You can now also select to enable the connection between TIF and the 3DEXPERIENCE™ Platform by clicking the "Enable" button.
| You must enable the connection to receive events from the DS Message Bus. |
Next Steps
Once you have a working connection between TIF and the 3DEXPERIENCE™ system, you should read and learn more about mapping events, creating custom REST endpoints and using scheduled tasks to understand how Jobs are triggered within TIF.
Also, understanding how a service is handling the jobs is important to understand.