SAP S/4HANA OData services
OData services
-
OData services (aka. individual OData APIs) are not enabled by default in the SAP system. The required OData services are to be enabled in order to use them.
-
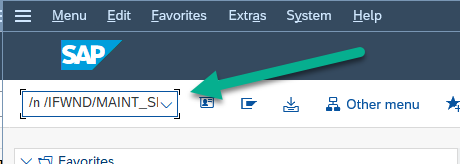
Navigate to the transaction "Activate and Maintain Services". Do so by typing "/n /IFWND/MAINT_SERVICE" in the command window:
-
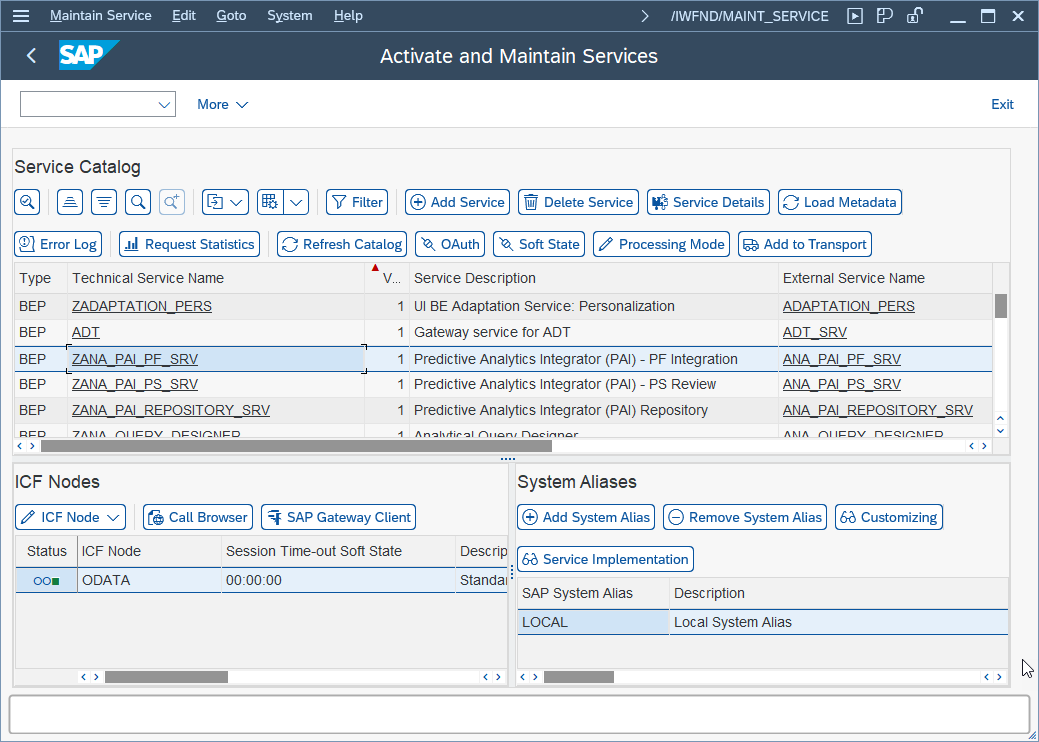
When opening the transaction you will see a list of all currently activated OData services. This list can be quite long on many systems:
-
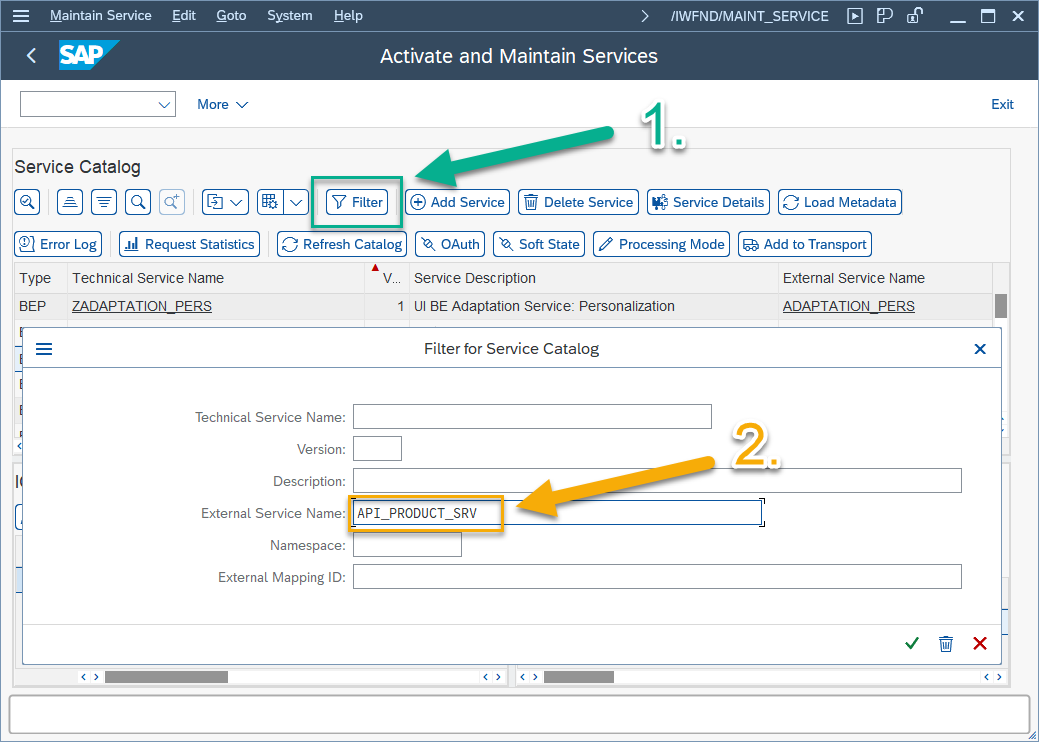
Since this list can be very long, let’s learn how to look for particular OData services in the list. We will search for the OData service "API_PRODUCT_SRV". This service includes API:s for reading and modifying SAP material data. Begin by pressing the filter button. A dialog will pop up. On this dialog, navigate to the field "External Service Name". Type in the name of the OData service you wish to search for. Apply the filter:
-
After this you will see one of two things. Either the OData service will show up in the list or no OData services show up in your list:
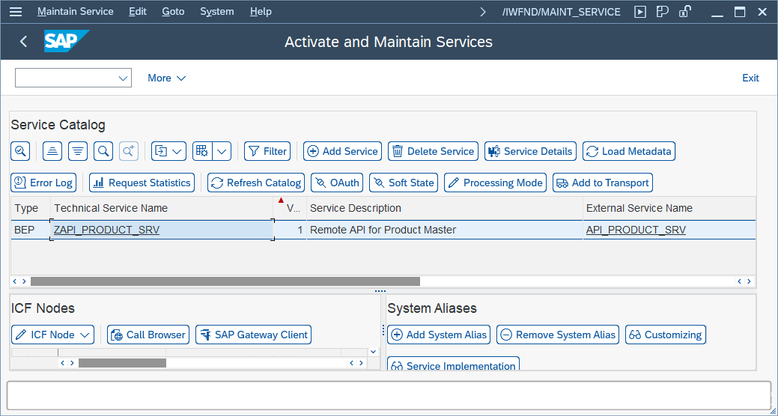
Figure 4. Activate and Maintain Service : Step 4
|
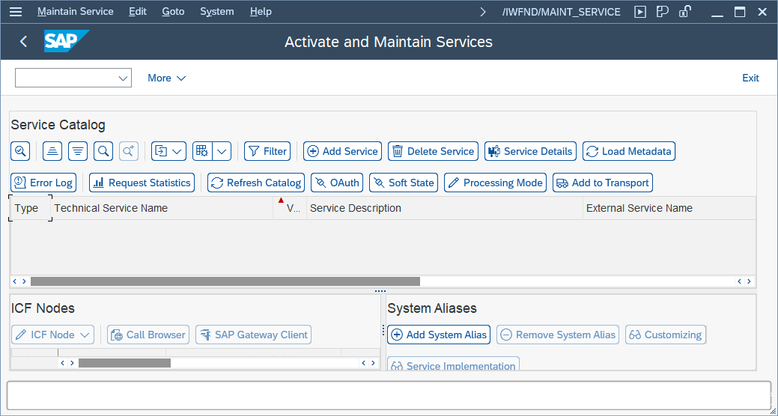
Figure 5. Activate and Maintain Service : Step 4
|
Activating new OData services
-
To enable communication with the Connector to your SAP system, you must enable a set of OData services. Without activating these services, the API:s that we rely on to talk to SAP will not work.
-
OData services to activate
-
You should enable the following OData services:
-
🔵 API_PRODUCT_SRV
🔵 API_BILL_OF_MATERIAL (v2) – (note the version number)
🔵 API_CHANGEMASTER (v2)
🔵 API_CV_ATTACHMENT_SRV
-
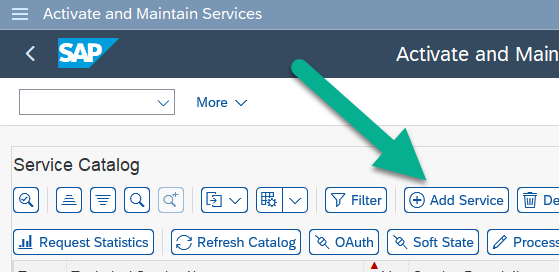
Begin adding a service by pressing the Add Service button. This should take you to a new screen.
-
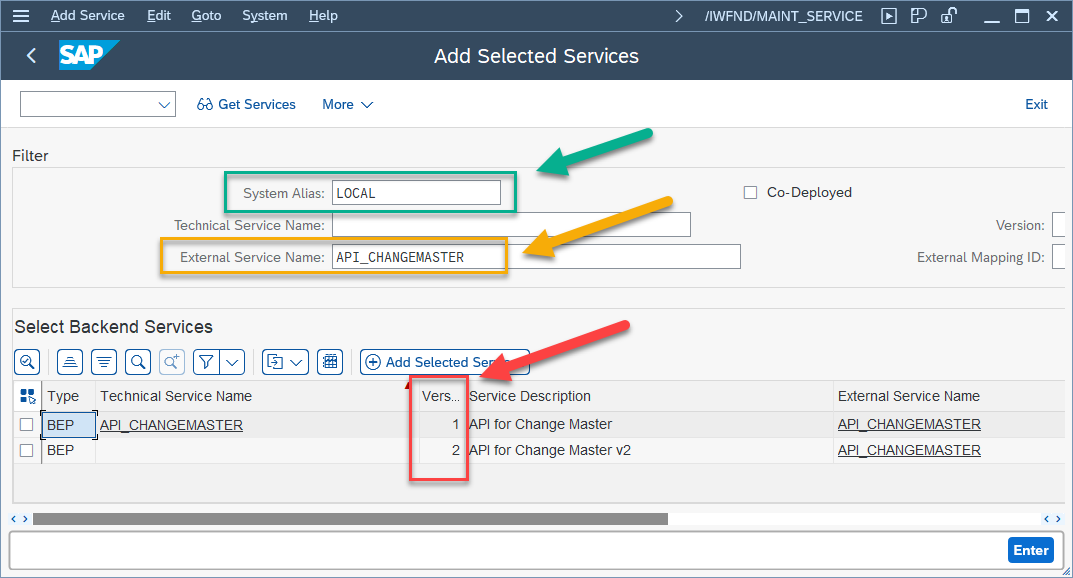
First, set the System Alias to "LOCAL". Next, type in your OData service name into the External Service Name field. When searching for OData services. Note that there may be multiple, versioned OData services available. Take care to select the correct version, as described in the list of OData services earlier in this section.
-
Select a service by marking its checkbox. Then press "Add Selected Services":
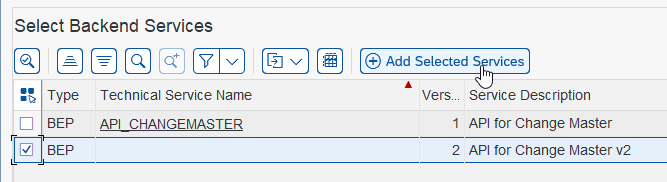
-
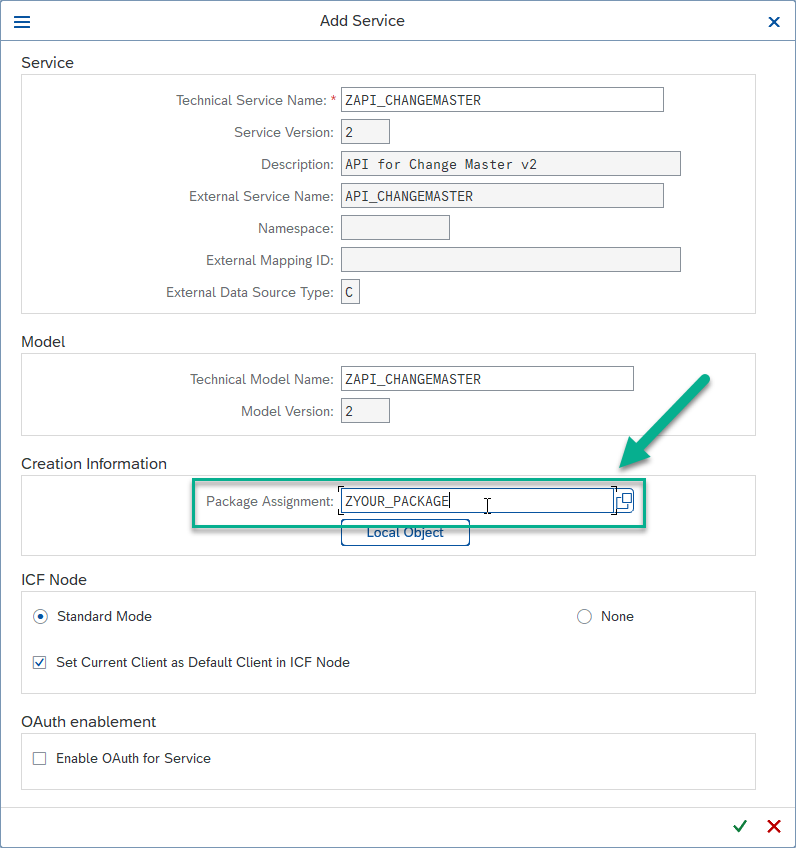
This will open a dialog. Here you can accept most of the prefilled settings, although you should assign this configuration to a package of your choice:
Maintaining number intervals
Materials (aka. Products)
Since we are creating materials in SAP, you might have to modify the number ranges for materials in SAP.
-
If 3DX is going to select numbers: You have to reserve a range that includes all possible 3DX material numbers.
-
If SAP is going to select numbers: You have to make sure that you have a suitable non-external number range created in the SAP system IMPORTANT: Agent : SAP S/4HANA Connector is to be configured.
Change Master
-
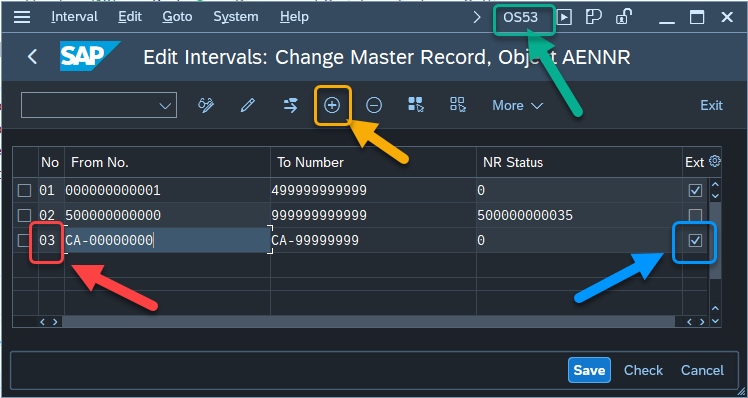
For changes, 3DX uses numbers on the form CA-XXXXXXXX. To allow these numbers to be used in SAP Change Masters, you must enable/reserve the range. To edit Change Master number ranges, open transaction "OS53".
-
Once the transaction is open:
🔵 Insert a new line (F6)
🔵 Set a unique Number Range Number
🔵 Set numbers from: CA-00000000 until: CA-99999999
🔵 Mark the number series as External