Configuration
App Integrations
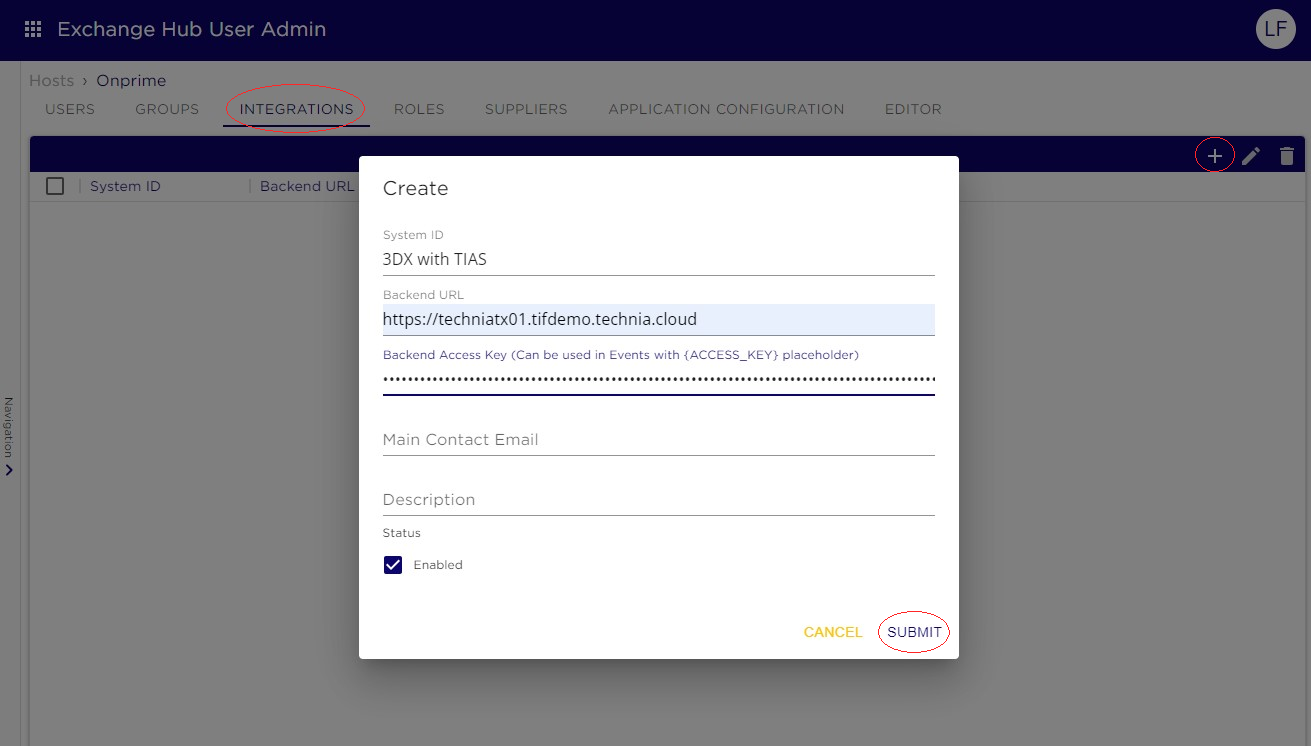
Step 1: Create Integrations
To create an Integration, follow these steps:
-
Navigate to the admin application in Exchange Hub.
-
Click on the Integrations tab.
-
Click on the "+" icon in the table to add a new integration.
-
Fill in form details.
Field Description System ID
Enter a unique identifier for the system.
Backend URL
Provide the URL of the TIF system that TX will interact with.
Backend Access Key
Enter the TIF token used for authentication and authorization.
Main Contact Email
Provide the main contact email address for the system.
Description
Briefly describe the system.
Enabled (Checkbox)
Toggle to enable or disable the system (defaults to enabled).
-
Click submit to create the Integration.
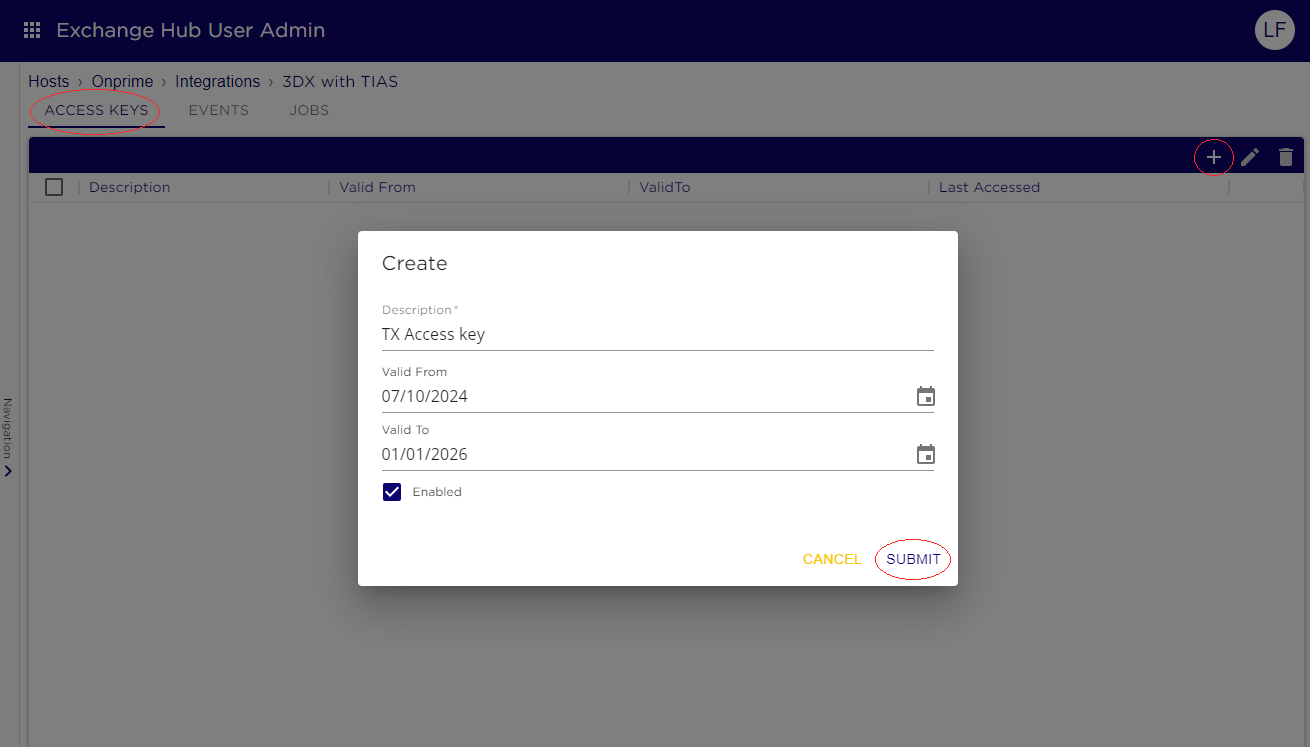
Step 2: Create Access Key
To create an Access Key, navigate to the created Integration by clicking the name in the table listing all Integrations under the Integrations tab in the admin application.When in the context of the Integration:
-
Click on the Access Key tab.
-
Click on the "+" icon in the table to add a new Access Key.
-
Fill in form details.
Field Description Description
Brief text description of the key.
Valid From
Start date from which the key is valid.
Valid To
End date until which the key is valid.
Enabled (Checkbox)
Toggle to enable or disable the key. Defaults to enabled (true).
-
Click "Submit" to create the Access Key.
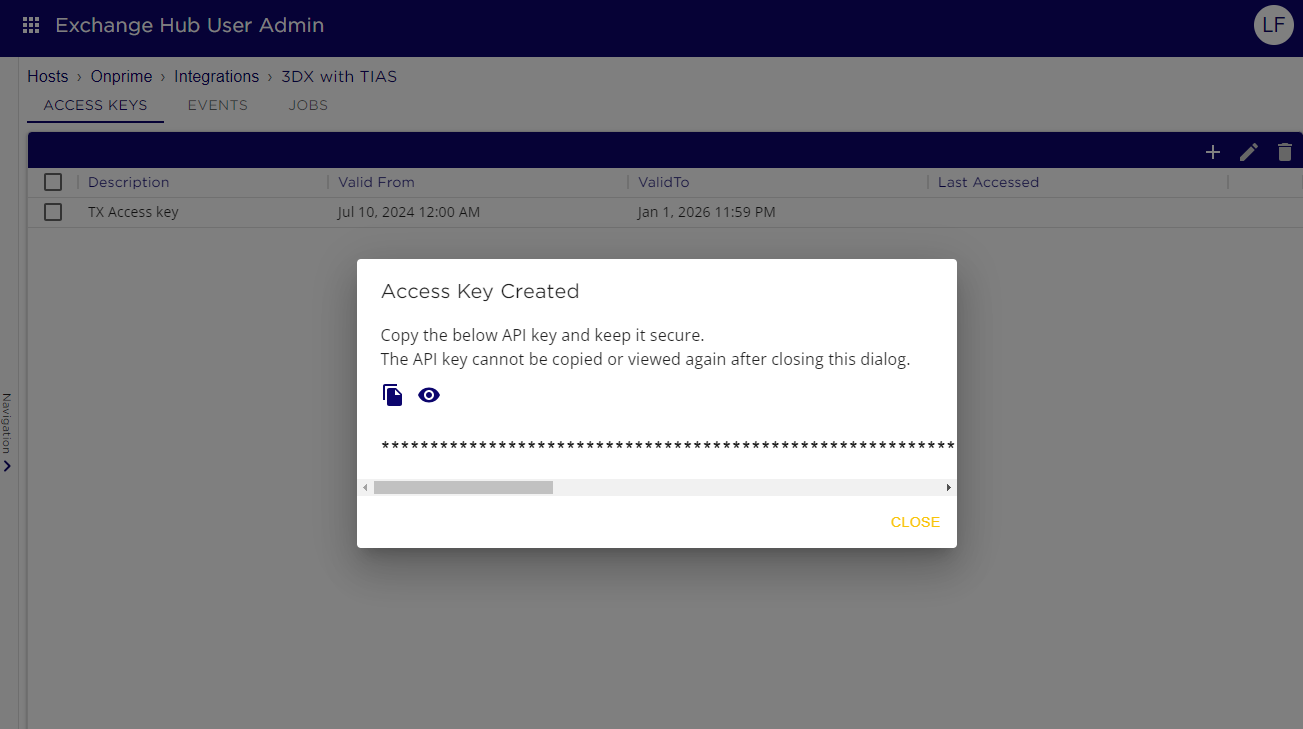
After the access key is created, a dialog box will appear displaying the API key. Copy the API key from the dialog and keep it secure. Note that the API key cannot be copied or viewed again after closing this dialog.
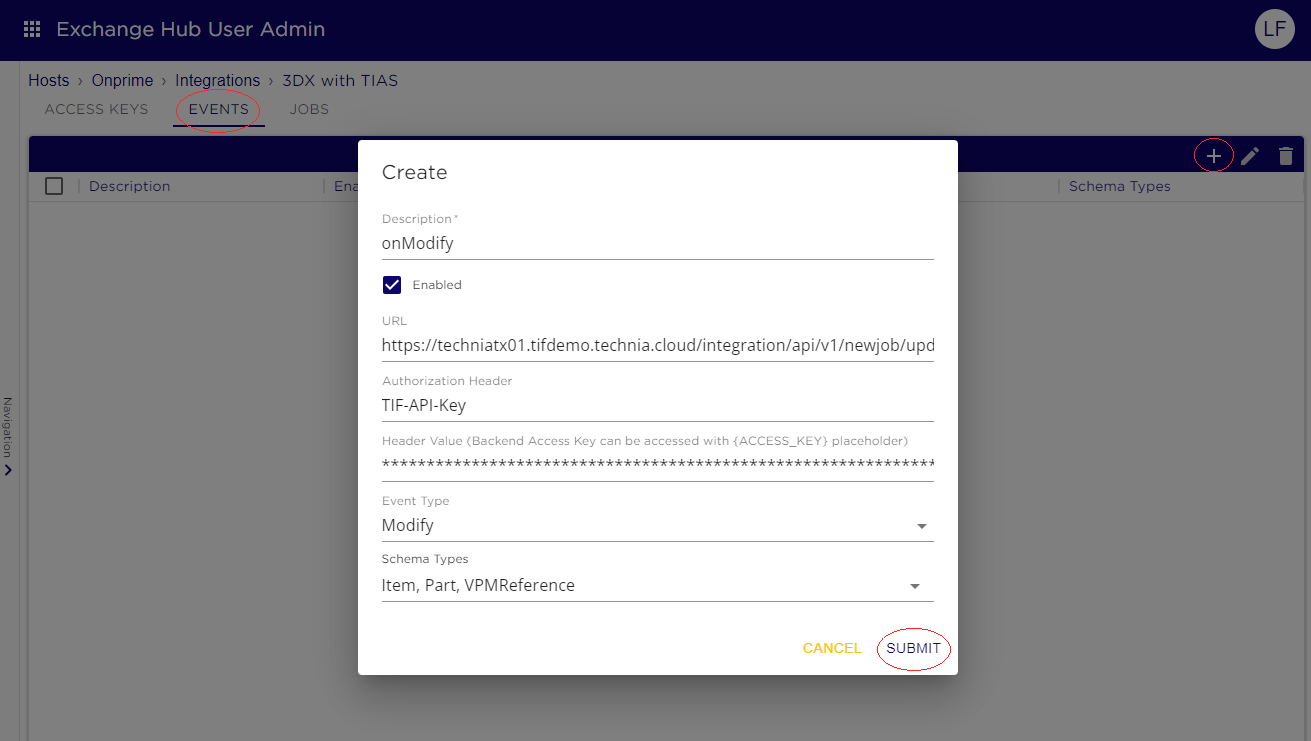
Step 3: Create Events
To create an Event, navigate to the created Integration by clicking the name in the table listing all Integrations under the Integrations tab in the admin application.When in the context of the Integration:
-
Click on the Events tab.
-
Click on the "+" icon in the table to add a new Event.
-
Fill in form details.
Field Description Description
A brief description of the event configuration.
Enabled (Checkbox)
Toggle to enable or disable the event configuration. Defaults to enabled (true).
URL
The specific endpoint URL where the event request will be sent.
Authorization Header
The request header used for authorization, created within the TIF application.
Header value
The value of the authorization header, containing a token created within the TIF application.
Event Type
The type of event triggering the integration.
Scheme Types
Multiple schema types associated with the event.
-
Click "Submit" to create the event.